Logical Volume Management Basics
While adding storage (directly) to Linux is an important concept for all Linux administrators to understand, directly adding and using individual disks is rarely used in an enterprise-grade Linux system. Enterprise computing needs a much more flexible solution - enter Logical Volume Management (LVM). This article will explore the three basic components of LVM - physical volumes, volume groups, and logical volumes.
Note: This demo is performed on a Rocky Linux installation. This is downstream of RHEL9 - there is no customer support available from Red Hat. Further, this demo is performed by
root- most (all?) storage manipulation jobs should be performed byrootin enterprise-grade computing.
Connect a New Disks
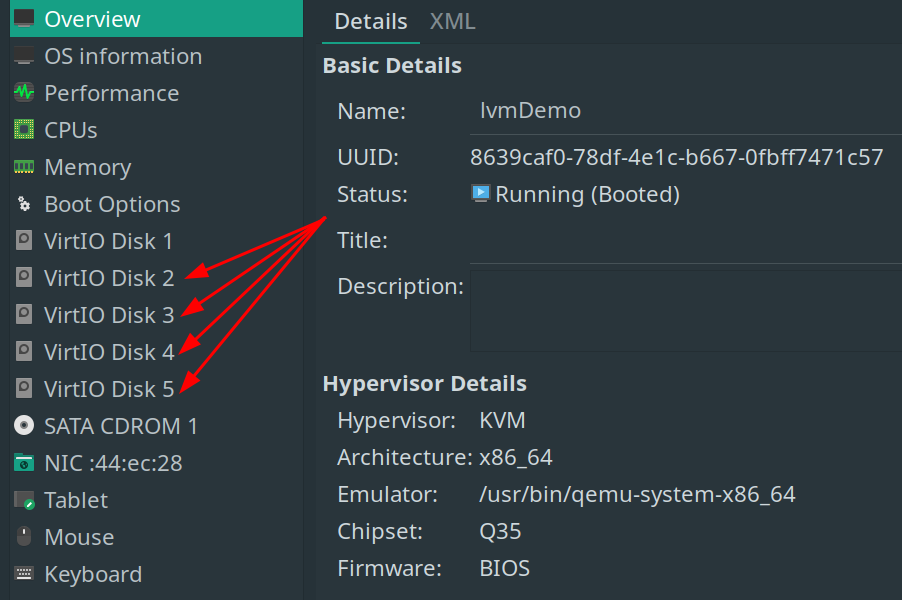
The procedure to add a new physical disk is outlined in Adding Storage to Linux - Connect a New Disk. The difference here is that Logical Volume Management makes sense when using several disks, not just one or two additional disks. For the demo below, four (4) 5GiB disks were added, and RAID5 was used - so now the data has redundancy built in (a much bigger topic in and of itself!).

Create a New Physical Volume
These newly created disks - vdb, vdc, vdd, and vde - will be visible in lsblk. Each of these needs to be added as a physical volume, the underlying storage unit of LVM. Physical volumes can be added and removed from a system as needed (physical volumes are often removed when the malfunction or are decommissioned due to obsolescence). This means that all that is needed to increase the storage on a system is to add a new physical (or virtual) disk and make it a physical volume. The enterprise can continue to add disks until the budget runs out - hundreds of petabytes are certainly possible.
The command to create physical volumes is:
#pvcreate <disks to add>
pvcreate /dev/vdb /dev/vdc /dev/vdd /dev/vde

Note this could have been done as 4 separate commands if required.
Exploring what physical volumes exist on a system can be done with pvs:

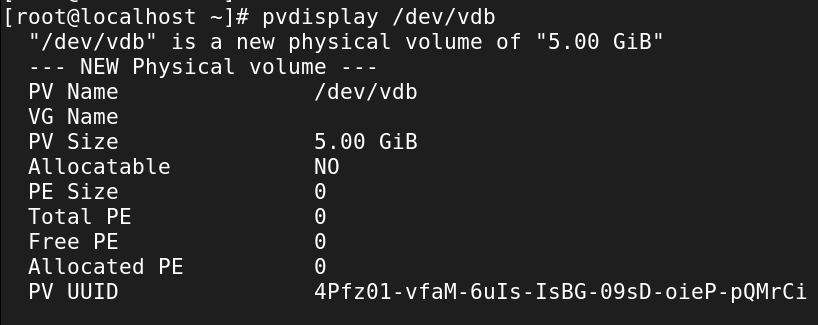
View the details of each physical volume with pvdisplay <diskName>:

The system now has several physical volumes that can be added to a volume group (up next!).
Create a Volume Group
The physical volumes can now be grouped together to act as a unit (and eventually be presented as such to the file system). The command to create a volume group is similar to creating physical volumes, but includes a volume group name:
# vgcreate <nameOfVolumeGroup> <disksToAdd>
vgcreate vg_demo /dev/vdb /dev/vdc /dev/vdd /dev/vde

The volume group is the central unit of organization for Logical Volume Management - physical volumes can be added and removed, and logical volumes can be added and removed. The volume group itself is constant. A few commands for managing volume groups include vgsscan (volume group scan):

List volume groups with vgs:

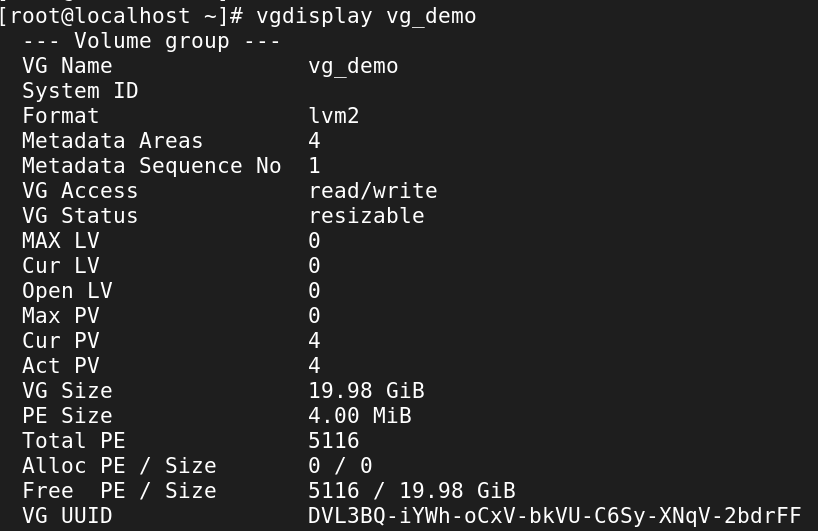
List information about a specific volume group with vgdisplay <volumeGroup>:

Create a Logical Volume
After establishing a volume group, it is time to create a Logical Volume from it. Note that it is possible to create more than one logical volume from a volume group - each will have its own file system and mount point (as per below). As mentioned above, it is possible to have software-based disk redundancy built in as well. Even more impressive, volume groups can be exported (and the logical volumes they contain) and imported into another system; the flexibility of volume groups is incredible. For this demo, we’ll create a basic logical volume that takes up 50% of the volume group’s free capacity and uses RAID5 disk redundancy:
#lvcreate --type <asRequired> -l <size> -n <lvName> <vgName>
lvcreate --type raid5 -l 50%FREE -n lv_demo vg_demo

Similar to volume group above, there are lots of useful commands to explore the logical volumes on a system. These include lvs:

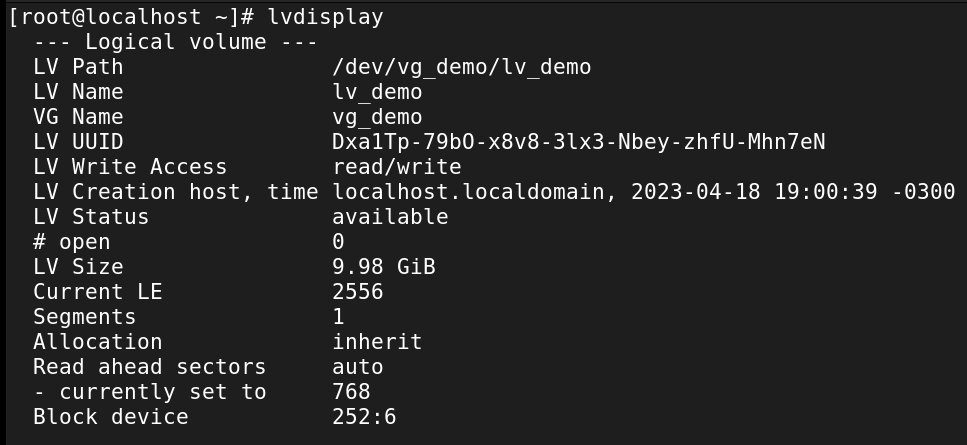
And lvdisplay:

Once the logical volume is created, its ready to be mounted to the system.
Make a File System on the Logical Volume
Similar to creating partitions from separate disks and mounting them to the Linux File System Hierarchy, the Logical Volume will need a file system. The location, by default, will be /dev/<volumeGroupName>/<logicalVolumeName>, and the standard mkfs.<type> will work here:
#mkfs.<fstype> <location>
mkfs.xfs /dev/vg_demo/lv_demo

Of course, a mount point needs to be created - in this case just mkdir /lvmDemo will suffice. We’re now ready to permanently mount the logical volume!
Permanently Mount the Logical Volume
Similar to mounting individual disks or partitions, the blkid command will show the UUID of the logical volume. To be a little more precise, add a grep for lv_demo:

Send the UUID to “/etc/fstab”
There is a very useful command that will actually append the UUID of the logical volume to /etc/fstab (reducing the fat-finger factor!):
#blkid -s UUID -o value <location of LVM under /dev/mapper>
blkid -s UUID -o value /dev/mapper/vg_demo-lv_demo >> /etc/fstab

It is always prudent to make a backup of
/etc/fstabbefore appending anything. It is also prudent (as demonstrated) to be sure the command being run is outputting the expected value before appending it to any file.
Now we’re ready to mount the logical volume just like any other disk in /etc/fstab:

Validate
The final step (as in any Enterprise Linux operation) is to validate the results. There are three main ways to do this:
mount -a
mount | grep lv_demo
findmnt --verify

Ensure that the mount point is accessible for creating files:

In this demo, the logical volume is owned by
rootand will need its permissions changed to be useful for other users. Check out Basic Linux Permissions for more details on this.
Finally, a quick reboot will re-validate that the LVM and /etc/fstab configurations are working correctly. Happy LVMing!