Introducing Podman
Podman, short for Pod Manager is an enterprise-grade containerization tool. Although it is largely associated with the RHEL family of distributions, it is a stand-alone project that runs on all enterprise-grade Linux distributions. See Podman.io for tons of documentation.
Docker vs Podman
Docker has been the containerization standard for several years in enterprise computing. However, Podman is a strong competitor with several significant advantages. These can be summarized as:
| Docker | Podman | |
|---|---|---|
| Separate Daemon? | Uses Docker daemon | Daemonless architecture |
| Requires Root Access? | Runs containers as root only | Runs containers as root and non-root |
| How are Images Built? | YAML-Based DockerFile | YAML-Based Image File, Buildah tool |
| Monolithic Architecture? | Yes | No |
| Container Orchestration? | Yes | Yes |
| Integrated into the Linux Kernel? | No | Yes |
The biggest advantages that Podman enjoys is that it is daemonless - meaning that root access is not needed to run containers. This is incredibly developer-friendly in enterprise computing, as developers rarely have root access to servers. Directly related to this daemonless architecture is that Podman is better integrated into the Linux kernel. This has to do with the actual libraries in use and is beyond the scope of this article, but in short Podman is more Linux-kernel friendly.
Note that setting up Podman still requires
rootaccess - much the same as installing other software requiresroot. However, once installed and configured, developers can run as many containers as they have resources to support without super-user powers.
The biggest challenge related to using Podman is that because Docker is so ubiquitous, it is easy to find playbooks that include Docker containers which developers have to “translate” into a Podman version. Luckily, Podman and Docker are largely command-equivalent (at least in recent versions) and this is becoming less and less of a challenge.
Command-Equivalent to Docker
For developers who have used Docker in the past, it comes as a huge relief to know that Podman is command-equivalent in most regards. This means that podman run -p 80:80 nginx:latest will produce exactly the same result as docker run -p 80:80 nginx:latest (all else being equal). So, while there will be some minor migration pains, the process is a minor inconvenience at worst.
A Quick Demo
Podman containers are created in the exact same way as other containers. The standard demo for this is to simply run podman run -d -p 8080:80 nginx which spins up an nginx webserver at localhost:8000. While this does show a container running, a more complicated demo might be closer to something found in enterprise.
The Business Requirement: Private Cloud for a Small Business
Imagine a small business needs a private document storage solution for all its employee documents but doesn’t want to use a public system such as Google Drive or Dropbox due to privacy and/or regulatory concerns. Using Podman, it is relatively simple to host a containerized private storage cloud such as NextCloud on a local server (either physical or virtual).
This would also work as a private instance on a public cloud service such as AWS or Azure but these are outside the scope of this article (and may or may not meet privacy/regulatory requirements).
The Solution: Containerized NextCloud
While Podman comes pre-installed on RHEL8 and up, if it is missing, it is easy to install Podman with dnf install podman or apt install podman(depending on the distribution). With Podman installed, issue the following commands (obviously changing the passwords/ports as needed):
# Creating a new Podman network
podman network create nextcloud-net

# Creating volumes in which to store the Nexcloud Data
podman volume create nextcloud-app
podman volume create nextcloud-data
podman volume create nextcloud-db

# Deploy Mariadb (underlying database for NextCloud)
podman run --detach --env MYSQL_DATABASE=nextcloud --env MYSQL_USER=nextcloud \
--env MYSQL_PASSWORD=DB_USER_PASSWORD --env MYSQL_ROOT_PASSWORD=DB_ROOT_PASSWORD \
--volume nextcloud-db:/var/lib/mysql --network nextcloud-net \
--name nextcloud-db docker.io/library/mariadb:10

# Deploy Nextcloud
podman run --detach --env MYSQL_HOST=nextcloud-db.dns.podman \
--env MYSQL_DATABASE=nextcloud --env MYSQL_USER=nextcloud \
--env MYSQL_PASSWORD=DB_USER_PASSWORD --env NEXTCLOUD_ADMIN_USER=NC_ADMIN \
--env NEXTCLOUD_ADMIN_PASSWORD=NC_PASSWORD --volume nextcloud-app:/var/www/html \
--volume nextcloud-data:/var/www/html/data --network nextcloud-net \
--name nextcloud --publish 8889:80 docker.io/library/nextcloud:20

# Credit: https://fedoramagazine.org/nextcloud-20-on-fedora-linux-with-podman/
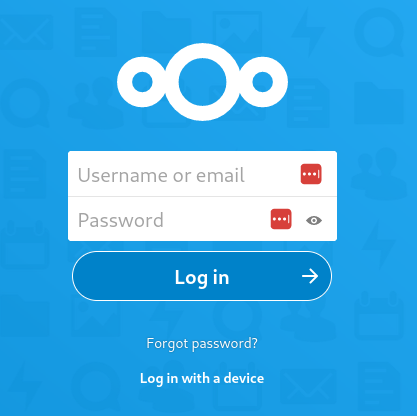
Simple as that, an instance of NextCloud is available for use at localhost:8889 which of course can also be accessed via IP, via hostfile or via an internal DNS server if the company is so equipped:

Best of all, the data stored in this container is permanent - residing in the Podman volume nextcloud-data - which can be backed-up and exported in the same way as any other directory on a Linux system.
To see how to make running this rootless container part of the boot procedure, see Running Rootless Containers as Services.